
New boots are a joy to own. The scent of fresh leather, unblemished surfaces, and sturdy construction are just some of the perks of new boots, but there’s one downside: the squeak. If you’ve been walking around with squeaky boots, you understand how annoying it can be. This squeak often occurs due to friction between different materials inside the boot or the exterior contacting the ground. But worry not; there are proven methods to eliminate this problem. In this article, we’ll walk you through the causes of boot squeaking and share practical hacks to keep your boots quiet. Why Do My Boots Squeak? Squeaking in boots often comes down to friction—whether it’s between the sole and insole, heel and upper, or the exterior rubbing on slick floors. New boots, especially high-quality leather ones, tend to have multiple layers of material like the insole, midsole, and welt that may rub together until fully broken in. The natural fibers in leather expand and contract when exposed to different temperatures and moisture levels, creating movement and noise. Another common source of squeaking is the reinforced heel cup, which can rub against other parts of the boot. Moreover, boots with new rubber outsoles may make noise on smooth surfaces such as tile or concrete. How Long Do New Boots Squeak? In most cases, squeaking lasts until your boots are fully broken in. This process can take anywhere from a few days to a few months. However, it’s possible to speed up this process and reduce squeaking using a few tried-and-tested methods. 3 Hacks to Keep Your Boots from Squeaking Hack #1: Use Talcum Powder to Reduce Friction Friction inside your boots is one of the main reasons for squeaking. The squeak often arises from the interaction between the insole and your socks, or the boot’s tongue rubbing against the upper. Here’s how you can fix this: Step 1: Remove the insoles and laces:Start by removing the laces and pulling out the insoles. These areas are prone to creating noise when in contact with the footbed or boot upper. Step 2: Apply talcum powder:Generously apply talcum powder inside the boot, specifically on the footbed and areas where the tongue touches the upper. This will reduce friction and minimize squeaking. Make sure the powder is evenly spread. Step 3: Clean off excess powder:Turn the boots upside down to remove excess powder. Afterward, replace the insoles and laces, and your boots should be noticeably quieter. Hack #2: Condition Your Boots Leather boots, especially thicker ones, may squeak due to the dryness of the leather. Conditioning them will make the leather more supple, which reduces squeaks. Step 1: Clean your boots:Before applying a conditioner, clean your boots with a leather brush and remove any dirt. Don’t forget to remove the laces and clean the tongue thoroughly. Step 2: Apply leather conditioner:Using a high-quality leather oil like Obenauf’s Leather Oil, apply an even layer to the boots. Don’t forget the tongue, as this area is notorious for causing squeaks. Allow the boots to absorb the conditioner. Step 3: Let the boots rest:Leave the boots for a few hours to allow the oil to penetrate the leather. Afterward, put the laces back in place and test the boots. Regular conditioning will soften the leather and reduce squeaking over time. Hack #3: Create Friction on the Outsoles If the squeak comes from the exterior, particularly from the soles, adding friction is the solution. Step 1: Clean the soles:Remove any dirt from the boot’s soles using a damp cloth. Ensure they are clean before moving on to the next step. Step 2: Use sandpaper to roughen the outsoles:Gently sand the outsoles with 80 or 120 grit sandpaper. This roughens up the rubber and provides better traction, which should stop the squeaking on slick surfaces like tile or hardwood floors. Additional Hacks to Stop Boot Squeaks Apply Leather Conditioner Routinely Conditioning your boots on a regular basis not only prolongs their lifespan but also helps break them in faster. Apply the conditioner to all parts of the boot, including the tongue. The more pliable the leather becomes, the less it will squeak. Use Sandpaper for Smooth Soles If your rubber-soled boots squeak, you can roughen up the soles with sandpaper. This simple trick will increase traction and reduce noise on smooth surfaces. Try Using WD-40 Though unconventional, some boot owners have found success using WD-40 on their leather boots. It can help soften the leather and reduce squeaking, especially in particularly stiff areas. However, be cautious about using it too often, as it’s not designed specifically for leather care. Try Using a Dryer Sheet FAQs Q1: Why do my boots squeak when I walk?Boots can squeak for several reasons, including friction between the sole and insole, or the heel rubbing against the upper. Identifying the source of the squeak will help you apply the correct fix. Q2: How do I stop my rubber soles from squeaking?Use sandpaper to roughen the outsoles of your boots. This will create more friction and reduce squeaking on smooth surfaces like tile or hardwood. Q3: How long will new boots squeak?New boots typically squeak until they are fully broken in, which can take days to months. Regular conditioning and cleaning can speed up this process and reduce noise.
Effective Ways to Stretch Leather Boots at Home
Leather boots are a timeless staple, but they can be uncomfortable when they fit too snugly. Whether you’ve bought a pair of boots that are just a bit tight or you’ve noticed your favorite pair feeling stiff, learning how to stretch and soften leather is essential. Leather is a durable, flexible material that softens and stretches over time, but sometimes, it needs a little help to get the perfect fit. In this guide, we’ll discuss various methods to stretch leather boots and make them more comfortable for everyday wear. What Is Leather Stretching? Leather stretching is the process of softening and expanding the leather to fit your feet more comfortably. Over time, exposure to air, sun, and wear can cause leather to lose its elasticity. Stretching the leather with the right techniques and products allows the boots to mold to your feet, creating a more customized and comfortable fit. Why Stretch and Soften New Leather Shoes? There are multiple reasons to stretch and soften leather shoes: How Much Can I Stretch Leather Boots? Leather boots can typically be stretched by about a quarter of a boot size. While you can’t expect them to grow a full size, slight stretching can make a big difference. Keep in mind that the leather type, treatment, and age will all impact how much the boots can be stretched. Can I Overstretch Leather Boots? Yes, overstretching leather can lead to damage. If you use too much force or heat, or stretch the boots for too long, you risk damaging the leather. Overstretching can break seams, cause cracks, and ruin the elasticity of the leather. It’s important to stretch carefully and check the boots regularly throughout the process. How to Prevent Stretching Leather Shoes Instead of waiting until your boots are too tight, follow these tips to prevent the need for stretching: How to Stretch and Soften Leather Boots Here are some tried-and-true methods for stretching leather boots at home: 1. Condition the Leather Leather conditioners are essential for keeping leather supple and preventing cracks. Apply a generous amount of conditioner with a soft cloth, focusing on the areas that feel tight. Let the conditioner absorb for 10 minutes before wearing the boots. Conditioning makes the leather more flexible, making it easier to stretch. 2. Wear Thick Socks An easy way to stretch leather boots is by wearing them with thick socks. The socks help create extra pressure to stretch the material naturally. Walk around in the boots for 2-4 hours to give the leather time to expand. Repeat this process as needed until the boots feel comfortable. 3. Insert Shoe Trees Shoe trees are great tools for keeping boots in shape and preventing cracks, but they can also be used to stretch leather boots. Place the shoe tree inside the boot and leave it for 24-48 hours. This method is gradual but effective in providing a more comfortable fit. 4. Stuff with Newspaper If you don’t have a shoe tree, use old newspaper. Roll the newspaper into tight balls and stuff them into the boots. Make sure to pack them tightly, especially in the areas that need stretching. Leave the newspaper in overnight or for 24 hours. This method may take longer but is cost-effective and simple. 5. Use a Shoe Stretcher A shoe stretcher is a more precise way to stretch leather boots. These tools allow you to target specific areas and adjust the width and length of the boots. Insert the stretcher, turn the knob to apply pressure, and leave it inside the boot for at least 24 hours. Shoe stretchers can often be purchased online or from shoe repair stores. 6. Apply Heat Heat is another effective way to soften leather boots. Use a hair dryer on a low setting to warm the leather for about one minute. Hold the dryer 4-6 inches away to avoid damaging the material. After heating, wear the boots with thick socks to help stretch them out. Alternatively, you can use steam from a kettle or clothes steamer to soften the leather. Let the steam rise inside the boot for 30 seconds to 1 minute, then put on the boots and walk around to stretch the material. 7. Use a Leather Stretching Spray Leather stretching sprays are designed to soften the leather and make stretching easier. Spray the product on the areas that need stretching, then either wear the boots with thick socks or use a shoe stretcher for the best results. 8. Use Rubbing Alcohol Rubbing alcohol can be used to stretch leather boots quickly. Mix one part rubbing alcohol with three parts water and spray it onto the tight areas of the boots. Wear the boots with thick socks until the leather dries. The alcohol helps loosen the fibers, allowing the leather to stretch. 9. Use Ice Water expands when it freezes, making it a useful tool for stretching boots. Fill a freezer bag with water, seal it tightly, and place it inside the boots. Put the boots in the freezer and let the water freeze. As the ice expands, it will stretch the leather. After the water has frozen, remove the boots and let the ice thaw before taking out the bags. Should You See a Professional Cobbler? If you’ve tried several stretching methods without success or are worried about damaging your boots, it’s best to consult a professional cobbler. Cobblers have specialized tools and expertise to stretch leather boots safely without causing damage. Can Leather Boots Shrink? Yes, leather boots can shrink if exposed to excessive heat or moisture. While overstretching can make leather boots too loose, shrinking them back to their original size is nearly impossible. That’s why it’s important to be careful when stretching and softening leather. FAQs 1. How long does it take to stretch leather boots? The time it takes to stretch leather boots depends on the method you use. Some methods, like wearing thick socks or using shoe trees, can take 24-48 hours, while others, like using
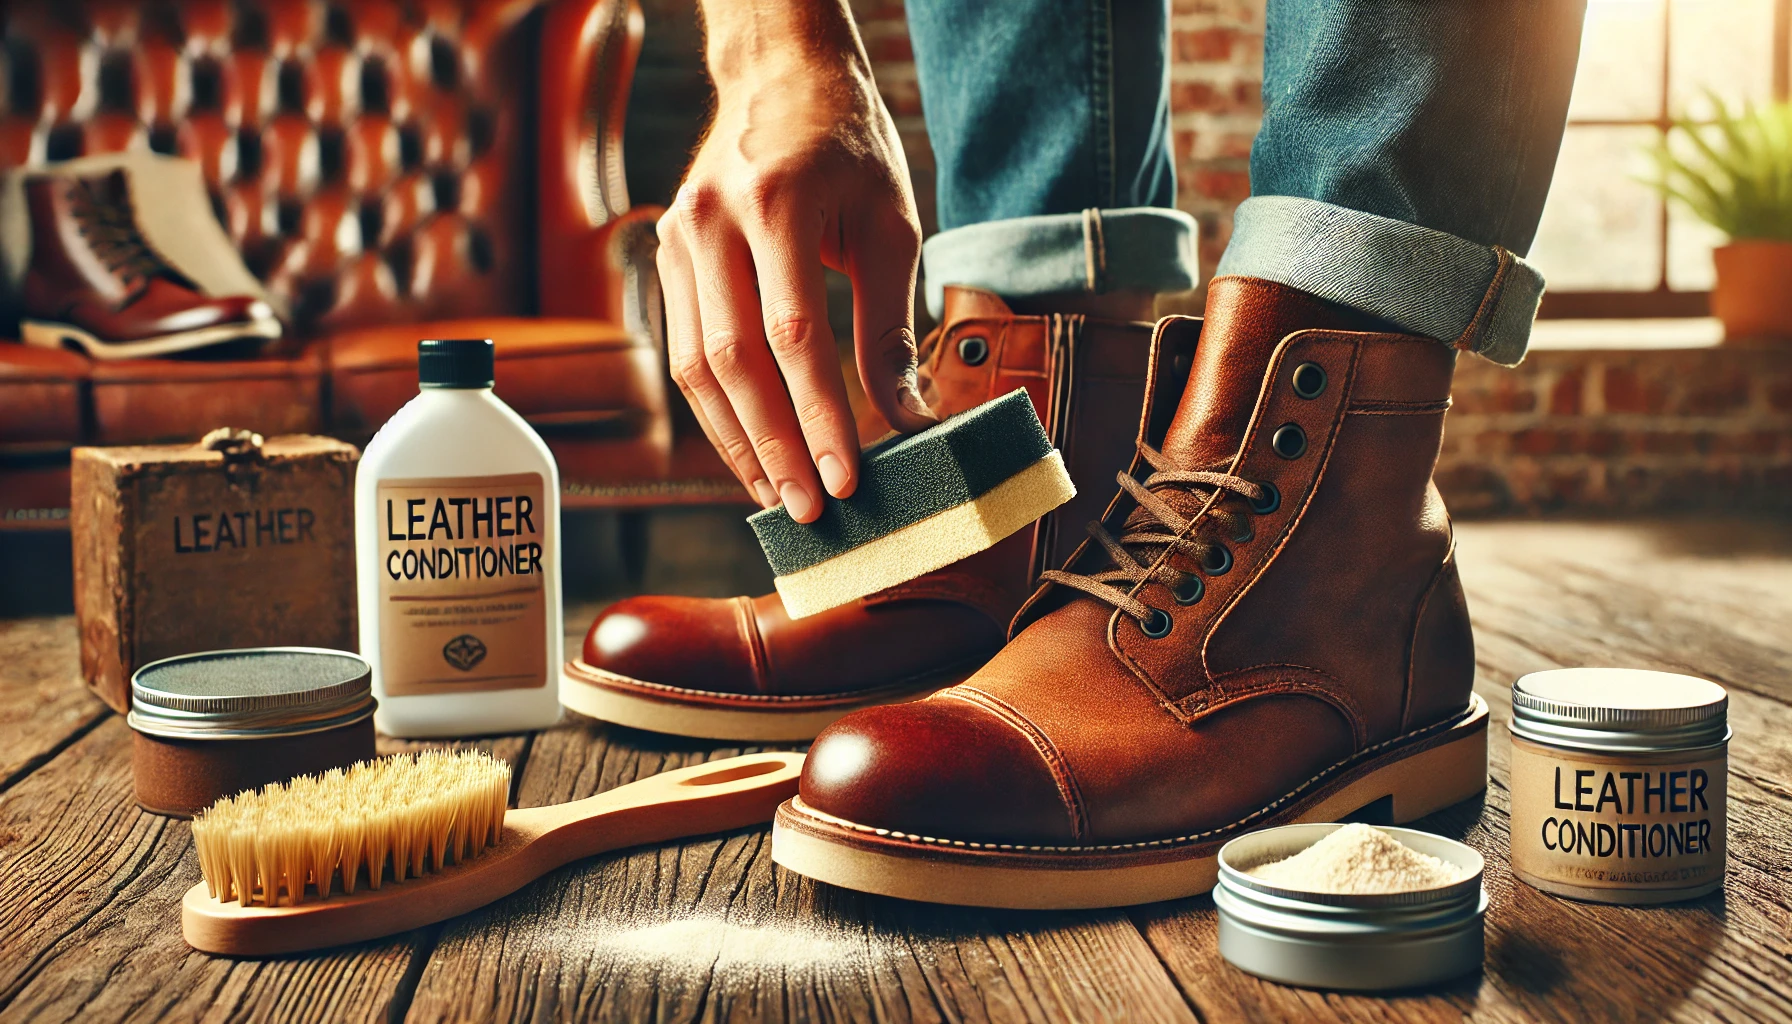
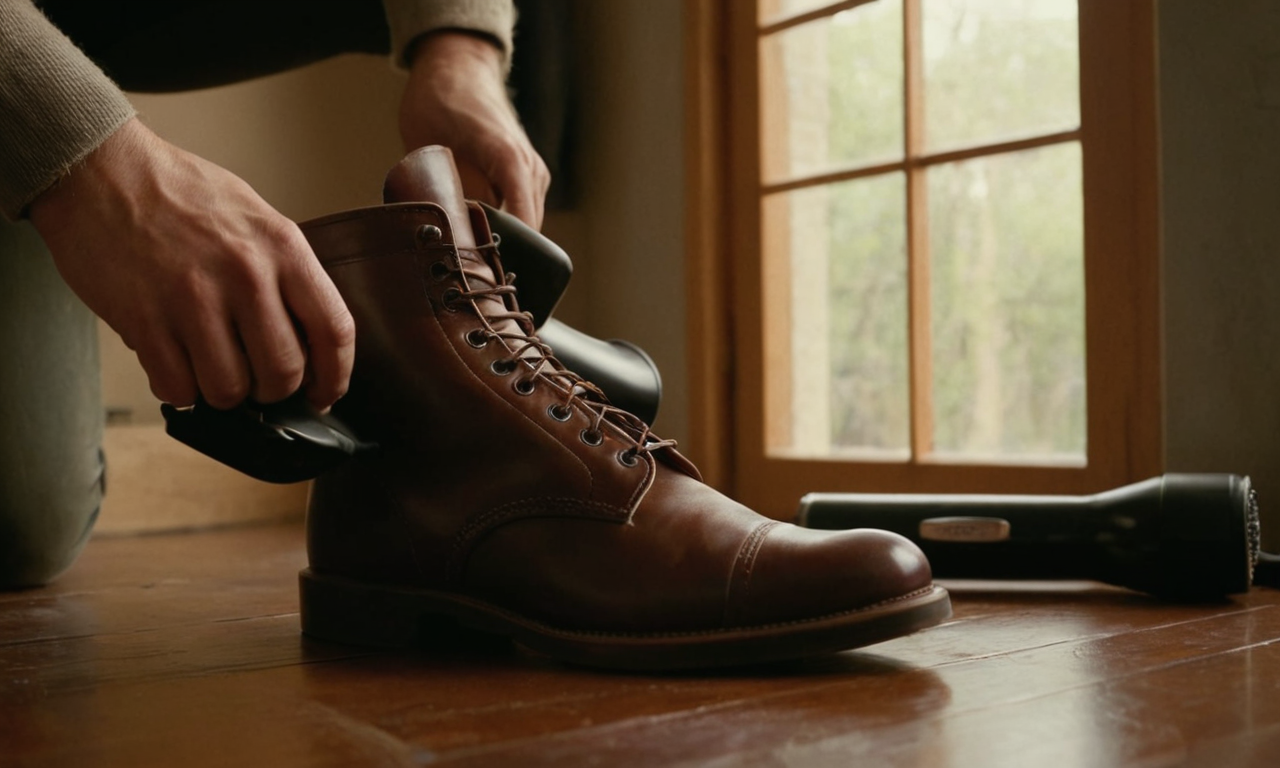
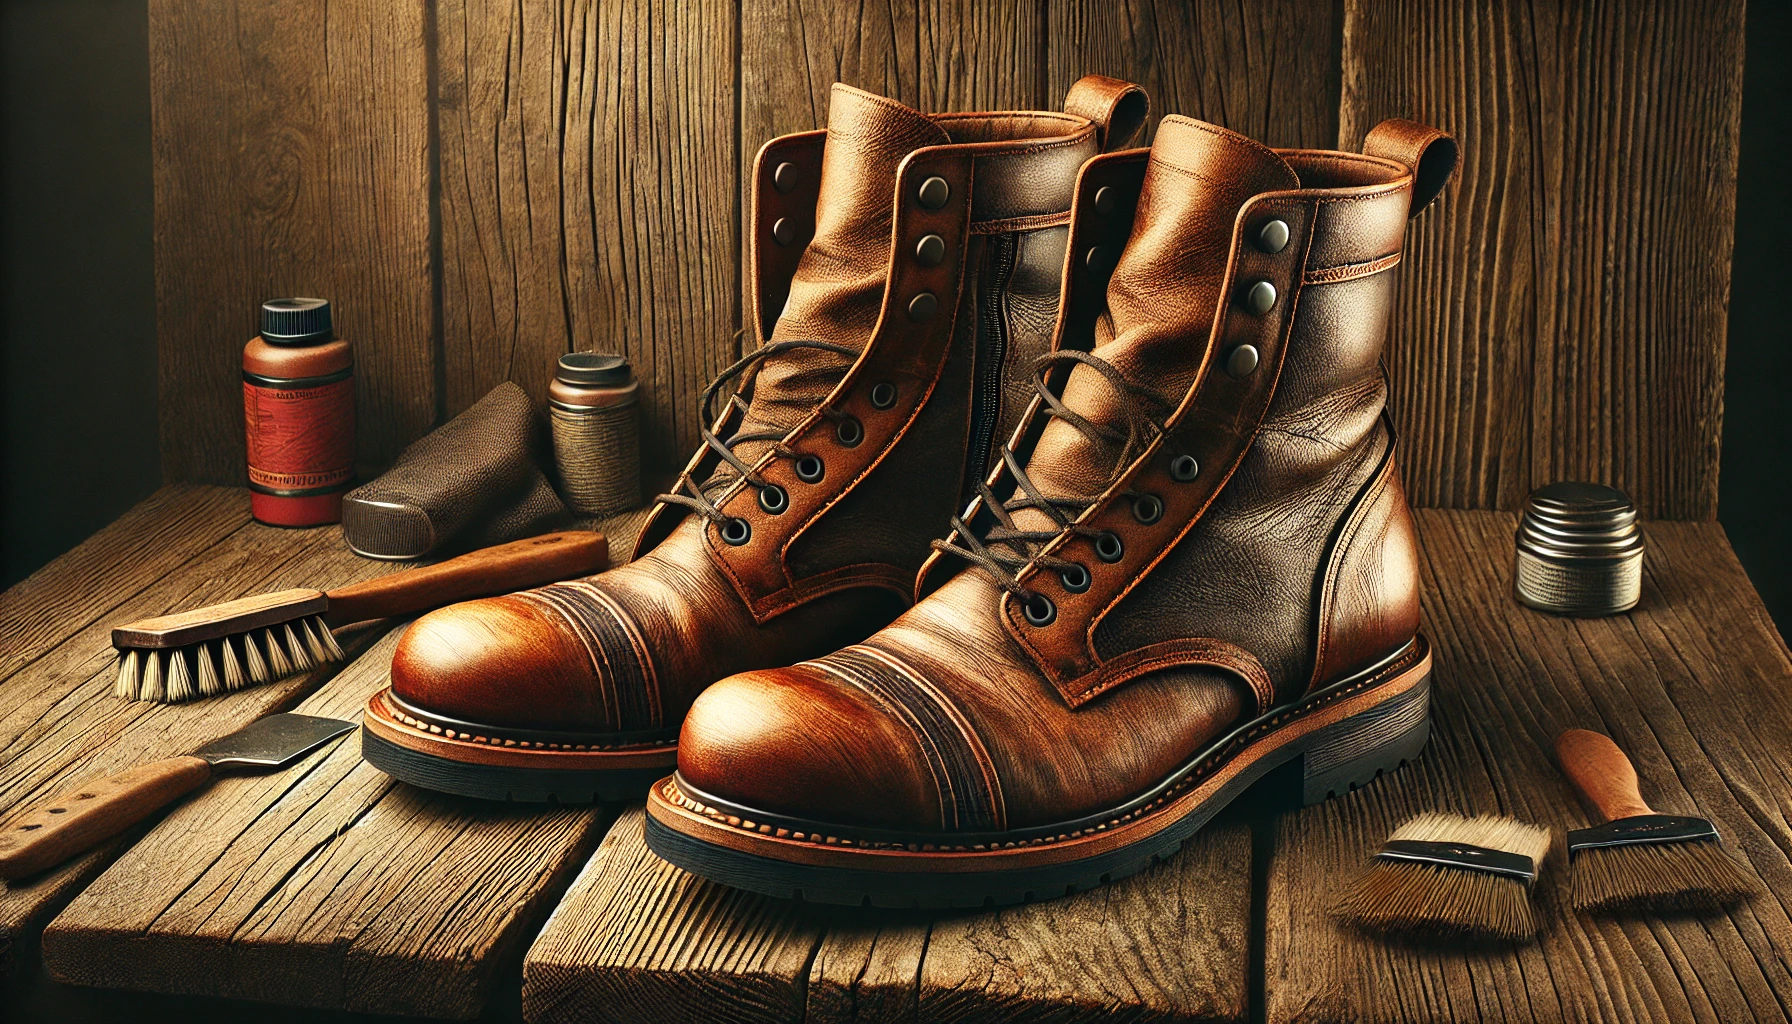
How to Maintain Leather Boots
Leather boots are an investment in both style and durability. Whether you wear them for fashion, work, or outdoor activities, maintaining your leather boots is essential to ensure they last for years. Proper care can keep your boots looking new and feeling comfortable, no matter the conditions they face. Here’s a comprehensive guide on how to maintain leather boots. 1. Regular Cleaning Why It’s Important:Dirt, dust, and grime can accumulate on leather boots, leading to discoloration and deterioration over time. Regular cleaning helps preserve the leather’s appearance and integrity. How to Do It: 2. Conditioning the Leather Why It’s Important:Leather is a natural material that can dry out, leading to cracks and stiffness. Conditioning keeps the leather supple and prevents it from becoming brittle. How to Do It: 3. Waterproofing Your Boots Why It’s Important:Water can cause leather to stain, swell, or even rot if not properly treated. Waterproofing adds a protective layer, keeping your boots safe from moisture. How to Do It: 4. Proper Storage Why It’s Important:Improper storage can lead to creases, deformation, and deterioration of your leather boots. Storing them correctly helps maintain their shape and condition. How to Do It: 5. Polishing for Shine Why It’s Important:Polishing not only makes your boots look new but also adds an extra layer of protection to the leather. It helps to maintain the color and finish of your boots. How to Do It: 6. Repairing Scuffs and Scratches Why It’s Important:Scuffs and scratches are inevitable with regular wear, but they can be minimized or repaired to keep your boots looking their best. How to Do It: 7. Dealing with Water Stains Why It’s Important:Water stains can mar the appearance of your leather boots. Addressing them promptly prevents permanent damage. How to Do It: 8. Preventing Odors Why It’s Important:Leather boots can develop odors from sweat and bacteria. Keeping them fresh is key to maintaining comfort and longevity. How to Do It: 9. Regular Inspections Why It’s Important:Regularly checking your boots allows you to catch small issues before they become bigger problems, ensuring long-term durability. How to Do It: 10. Seeking Professional Care Why It’s Important:Sometimes, your boots need more care than you can provide at home. A professional cobbler can offer services that go beyond basic maintenance. How to Do It: Conclusion Maintaining leather boots is about more than just keeping them clean. With regular care and attention, you can ensure your boots remain comfortable, stylish, and durable for many years. By following these steps—cleaning, conditioning, waterproofing, storing, and more—you’ll keep your leather boots in top shape, ready for any adventure. FAQs

Leather Trousers and Boots: A Stylish and Timeless Combination
Leather trousers and boots have long been a staple in the fashion world, exuding a sense of confidence, style, and durability. Whether you’re aiming for a rugged, edgy look or something more polished and sophisticated, this combination never fails to impress. In this article, we’ll explore the history, styles, and tips for wearing and maintaining leather trousers and boots. So, let’s dive into the world of leather fashion and discover why these two pieces are a match made in style heaven. The History of Leather Trousers and Boots Leather has been used as clothing material for centuries, valued for its durability and protection. The history of leather trousers can be traced back to ancient civilizations, where they were worn by warriors and hunters. These early versions were designed for functionality, offering protection in harsh environments. Boots, on the other hand, have a rich history in various cultures, from the riding boots of European knights to the sturdy footwear of Native Americans. Over time, both leather trousers and boots have evolved from purely functional items to iconic fashion statements. Why Leather Trousers and Boots are a Perfect Pair One of the reasons leather trousers and boots complement each other so well is their shared durability and functionality. Leather is a tough material that can withstand wear and tear, making it ideal for both trousers and boots. Moreover, this combination offers incredible versatility in fashion. You can pair leather trousers with different styles of boots to create various looks, from casual to formal. The rugged appeal of leather also adds an edge to any outfit, making it a popular choice for those looking to make a bold statement. Different Styles of Leather Trousers Leather trousers come in various styles, each offering a unique look and feel: Varieties of Leather Boots Just like trousers, leather boots come in various styles to suit different occasions and tastes: Choosing the Right Leather Trousers When selecting leather trousers, it’s essential to consider fit, comfort, and style: Selecting the Perfect Pair of Leather Boots When choosing , consider how they will complement your trousers: Styling Leather Trousers and Boots Here are some ways to style leather trousers and boots for different occasions: Caring for Your Leather Trousers and Boots To keep your leather trousers and boots looking their best, follow these care tips: Leather Trousers and Boots in Popular Culture Leather trousers and boots have made countless appearances in popular culture: The Environmental Impact of Leather Leather production has significant environmental impacts, but there are ways to make more sustainable choices: Conclusion Leather trousers and boots are more than just a fashion statement—they’re a timeless combination that exudes confidence, style, and durability. Whether you’re dressing up for a night out or going for a casual, everyday look, this pairing is versatile and always on-trend. By choosing the right styles, caring for your leather pieces, and making mindful choices, you can enjoy the rugged elegance of leather trousers and boots for years to come. FAQs
how to clean mold off leather boots?
Leather boots are more than just footwear; they’re an investment. Whether you’re wearing them for style, work, or outdoor adventures, keeping them in top condition is crucial. However, one of the most common enemies of leather boots is mold. Mold can develop on your boots if they’re stored in a damp or humid environment, leading to unsightly stains and potential damage to the leather. But don’t worry; with the right approach, you can clean mold off your leather boots and keep them looking great. Understanding Mold on Leather Boots What is Mold? Mold is a type of fungus that thrives in warm, damp environments. It appears as green, black, or white spots and can spread quickly if not addressed. Leather, being a natural material, can easily attract mold if not properly cared for. How Does Mold Form on Leather? Mold forms on leather when moisture gets trapped on or within the material. This can happen if your boots are stored in a humid environment, exposed to rain, or not allowed to dry properly after use. Over time, this moisture becomes a breeding ground for mold spores. Common Signs of Mold on Leather Boots If you notice a musty odor, discoloration, or fuzzy patches on your leather boots, these are clear signs of mold. It’s essential to address these signs as soon as you spot them to prevent further damage to the leather. Preparing to Clean Mold Off Leather Boots Gathering Necessary Supplies Before you start cleaning, make sure you have the following supplies on hand: Safety Precautions to Take Mold can be harmful if inhaled, so it’s important to take safety precautions: Choosing the Right Environment for Cleaning Choose a dry, well-ventilated area for cleaning your boots. Avoid cleaning in a damp environment, as this could worsen the mold problem. Step-by-Step Guide to Cleaning Mold Off Leather Boots Step 1: Remove Surface Mold Start by removing the surface mold with a soft brush or cloth. G ently brush off the mold, being careful not to press too hard. This prevents the mold from getting further embedded into the leather. Make sure to dispose of the brush or cloth after use to avoid spreading the mold spores elsewhere. Step 2: Clean the Boots with a Vinegar Solution Vinegar is a natural mold killer, making it an excellent choice for cleaning leather boots. Here’s how to do it: Step 3: Use a Leather Cleaner After treating the mold with vinegar, it’s important to use a leather cleaner to restore the leather’s natural oils and maintain its quality: Step 4: Drying the Leather Boots Properly Proper drying is crucial to prevent mold from returning. Here’s how to do it right: Preventing Mold on Leather Boots in the Future Proper Storage Tips Storing your boots correctly is key to preventing mold: Regular Maintenance and Cleaning Regularly cleaning and conditioning your leather boots will keep them in good condition and prevent mold: Using Moisture Absorbers Moisture absorbers like silica gel packs can be placed inside your boots to keep them dry. These are particularly useful if you live in a humid climate or store your boots for long periods. Dealing with Stubborn Mold When to Seek Professional Help If the mold is deeply embedded or covers a large area, it might be best to seek professional cleaning services. Professionals have the right tools and expertise to remove mold without damaging the leather. Alternative Methods for Tough Mold Stains If vinegar doesn’t completely remove the mold, you can try these alternatives: The Risks of DIY Mold Removal While DIY methods can be effective, they carry some risks. Improper cleaning can damage the leather, and using the wrong products can cause discoloration or dryness. Always test any cleaning solution on a small, inconspicuous area first. Conclusion Cleaning mold off leather boots may seem daunting, but with the right approach, it’s entirely manageable. By following the steps outlined above, you can restore your boots to their former glory and ensure they remain mold-free in the future. Remember, regular maintenance and proper storage are key to preventing mold from becoming a recurring issue. FAQs Can mold permanently damage leather boots? Yes, mold can permanently damage leather if left untreated. Mold eats away at the leather fibers, leading to discoloration, weakening of the material, and even holes in severe cases. That’s why it’s important to address mold as soon as you notice it. How often should I clean my leather boots to prevent mold? To prevent mold, it’s a good idea to clean and condition your leather boots at least once every few months, especially if they’re stored in a humid environment. Regular cleaning helps remove any moisture that could lead to mold growth. What should I do if mold keeps returning? If mold keeps returning, it might indicate a persistent moisture problem. Consider storing your boots in a different location, using moisture absorbers, and ensuring they are completely dry before storing them. If the problem persists, seek professional cleaning to remove any deep-seated mold spores.
how to distress leather boots
Distressed leather boots are all about personality. Whether you’re aiming for a rugged cowboy look or something more urban and edgy, distressing your leather boots gives them a unique character that sets them apart from the crowd. But why distress new boots? It’s simple: new boots can look too perfect, too polished. Adding a bit of wear and tear gives them a story, a sense of history—even if you’ve just taken them out of the box. Ready to give your boots a makeover? Let’s get started! Understanding the Distressing Process What Does Distressing Involve? Distressing leather is essentially the process of making your boots look aged and worn. This can involve scuffing, scratching, and applying substances that make the leather look weathered. The goal is to achieve a natural, lived-in look that still preserves the quality and durability of the leather. Types of Distressing Effects You Can Achieve There are various levels of distressing, from subtle to heavy. You can choose to lightly scuff the boots for a gently worn look or go all out with deep scratches, fading, and heavy wear marks. It all depends on the style you’re going for and how bold you want to be. Tools and Materials You’ll Need Before you start, gather the following tools and materials: Step-by-Step Guide to Distressing Leather Boots Step 1: Clean Your Boots Before you start distressing, it’s crucial to clean your boots thoroughly. Dirt and grime can interfere with the distressing process, so make sure your boots are free of any debris. Step 2: Scuffing the Leather Scuffing is one of the simplest and most effective ways to distress leather. Step 3: Creating a Worn Look with a Wire Brush A wire brush can add a rough, rugged texture to your boots. Step 4: Applying Rubbing Alcohol Rubbing alcohol is a great way to give your boots a faded, aged appearance. Step 5: Adding Depth with Wax and Polish Wax and polish can enhance the distressed look by adding depth and contrast. Step 6: Optional Techniques for Extra Character If you want to take your distressing to the next level, here are a few more techniques: Finishing Touches Buffing the Boots for a Natural Sheen Once you’ve finished distressing, use a clean cloth to buff the boots. This will bring out a natural sheen and help the distressing blend more seamlessly with the rest of the leather. Final Inspection Take a moment to inspect your work. If certain areas look too new or too distressed, you can touch them up with some light scuffing, polishing, or additional techniques. Caring for Distressed Leather Boots Maintaining the Distressed Look To keep your boots looking perfectly worn-in, avoid using strong cleaners that might remove the distressing. Instead, wipe them down with a damp cloth as needed, and reapply wax or polish occasionally to maintain their character. Tips for Cleaning Without Removing the Distressing When cleaning your distressed boots, be gentle. Use a soft cloth and mild cleaner sparingly, focusing on dirt removal without scrubbing away the distressing you’ve worked hard to create. Common Mistakes to Avoid Over-Distressing the Leather It’s easy to get carried away with distressing, but too much can weaken the leather and make your boots look artificially aged. Always start with less and add more distressing gradually. Using Harsh Chemicals Avoid using harsh chemicals that can damage the leather’s integrity. Stick to rubbing alcohol, wax, and polish, which are safer for distressing. Ignoring Safety Precautions Distressing leather involves sharp tools and chemicals. Always work in a well-ventilated area, wear gloves if necessary, and handle sharp objects with care. Conclusion Distressing leather boots is a creative way to personalize your footwear and give them a unique, rugged look. By following these steps, you can achieve the perfect level of distressing that matches your style. Remember, the process is as much about experimentation as it is about technique—don’t be afraid to try different methods and see what works best for you. Happy distressing! FAQs Can I distress faux leather boots? Yes, you can distress faux leather boots, but be cautious. Faux leather is more delicate than genuine leather, so use gentle methods like light scuffing with fine sandpaper and avoid harsh chemicals. How long does it take to distress leather boots? The time it takes to distress leather boots depends on the techniques you use and the level of distressing you want to achieve. It can take anywhere from a couple of hours to a full day if you’re doing multiple layers and effects. Will distressing weaken the leather? If done carefully, distressing should not significantly weaken the leather. However, over-distressing or using harsh chemicals can damage the leather and reduce its durability
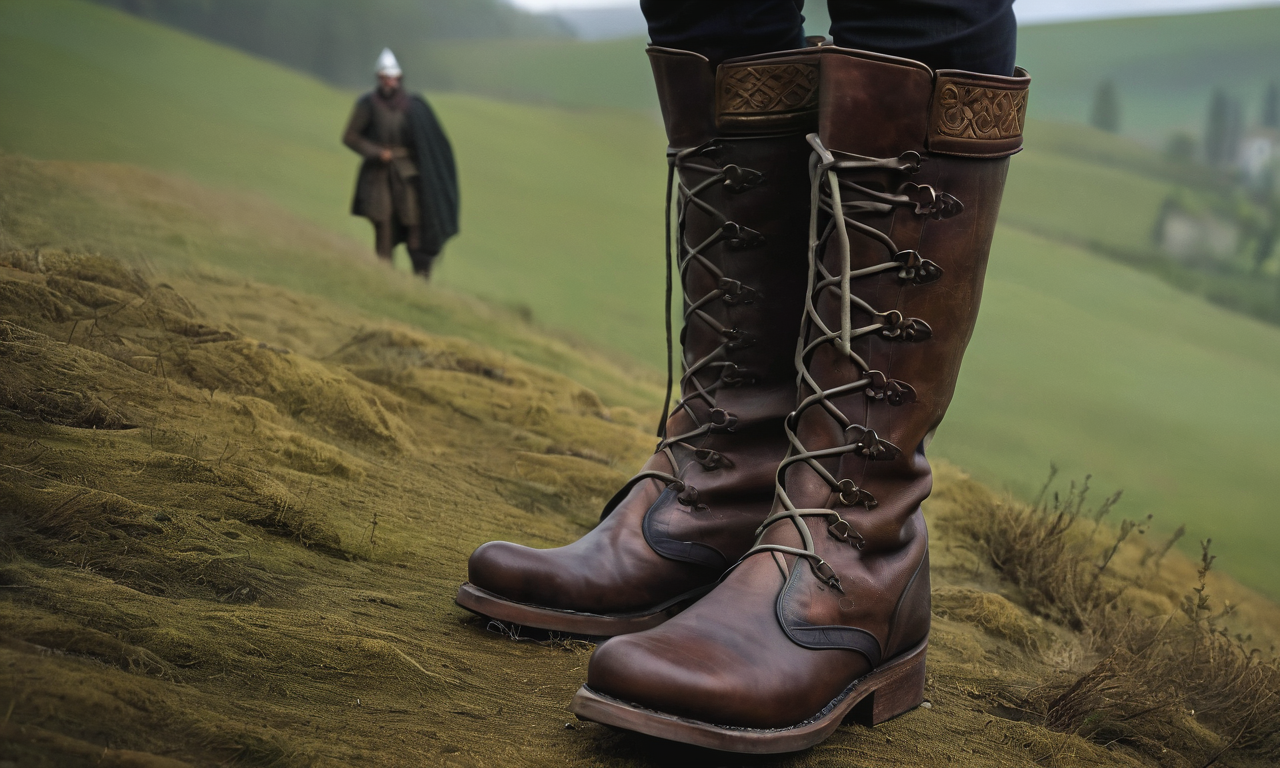
What Were Medieval Leather Boots Like?
The allure of medieval footwear is undeniable. Picture yourself walking the cobblestone streets of a bustling medieval town. What would you be wearing on your feet? The answer lies in the fascinating world of medieval leather boots. Why study medieval leather boots, you ask? Well, these pieces of history tell us not just about fashion, but about the daily lives, technologies, and cultures of the past. So, let’s step back in time and explore the world of medieval leather boots. Materials Used Types of Leather: Leather was the primary material used in medieval boots, and not just any leather. The choice of animal hide—be it cow, goat, or pig—affected the texture, durability, and flexibility of the final product. Cowhide was common for its strength, while goat and pig leather were prized for their softness. Other Materials Incorporated: Apart from leather, medieval bootmakers sometimes incorporated other materials such as wood for soles, metal for reinforcements, and even fabric for decorative elements. These materials not only added to the durability of the boots but also provided opportunities for artistic expression. Crafting Process Tanning the Leather: The journey of a medieval boot began with tanning the leather, a process that involved treating animal hides to prevent decay and make them suitable for footwear. Medieval tanners used natural tannins found in tree bark, creating a durable and flexible leather perfect for boots. Cutting and Stitching: Once they tanned the leather, they cut it into various pieces based on the boot design. Then, they stitched these pieces together using strong, waxed threads.The stitching technique was crucial, as it determined the boot’s strength and longevity. Designs and Styles `Common Designs: Medieval boots came in various designs, each serving different purposes. The ankle-length boots were common for everyday wear, while knee-high boots were favored by riders and soldiers. Some boots featured pointed toes, a style known as poulaines, which became a fashion statement in the late Middle Ages. Regional Variations: Just as with any fashion trend, medieval boots exhibited regional variations. In Northern Europe, for example, boots were often more robust to withstand colder climates, whereas in Southern Europe, lighter and more decorative boots were preferred. Functionality and UsesEveryday Use For the average medieval person, boots were a daily necessity. Farmers, merchants, and craftsmen wore them for protection and comfort. These boots were designed for practicality, with sturdy soles and minimal decoration. Military Boots In contrast, military boots needed to be both functional and durable. Soldiers required boots that could withstand long marches and harsh conditions. These boots often had reinforced soles and higher shafts for added protection. Maintenance and Care How Were They Maintained? Maintaining leather boots in medieval times was crucial for their longevity. Regular cleaning and oiling were common practices to keep the leather supple and water-resistant. This care ensured that the boots remained in good condition despite daily wear and tear. Tools and Techniques Used: Medieval people used simple yet effective tools and techniques for boot maintenance. Bone or wooden implements were used to scrape off dirt, while animal fats and oils were applied to condition the leather. These practices have influenced modern leather care techniques. Medieval Bootmakers Who Were They? Bootmakers, known as cordwainers, were skilled artisans who played a vital role in medieval society. Their expertise in working with leather and creating durable footwear made them highly respected professionals in their communities. Their Skills and Tools: Cordwainers used a variety of tools, including knives, awls, and hammers, to craft their boots. Their skills in measuring, cutting, and stitching leather were honed over years of apprenticeship and practice, resulting in high-quality footwear. Impact on Modern Footwear Influences Seen Today: The influence of medieval boots on modern footwear is undeniable. Many contemporary boot styles, such as riding boots and combat boots, draw inspiration from their medieval counterparts. The emphasis on durability, functionality, and style has endured through the centuries. Legacy of Medieval Boots: The legacy of medieval boots is evident in the craftsmanship and design principles that continue to shape modern shoemaking. The focus on quality materials and meticulous construction remains a hallmark of high-end footwear brands today. Collecting Medieval Boots For Historians: For historians, medieval boots are valuable artifacts that provide insights into the daily lives, social structures, and technological advancements of the past. Studying these boots helps piece together a more complete picture of medieval society. For Fashion Enthusiasts: Fashion enthusiasts also find medieval boots fascinating. These boots represent a unique blend of practicality and style, showcasing the creativity and innovation of medieval fashion. Collecting and wearing replicas of medieval boots has become a trend among history buffs and fashion aficionados alike. Medieval Boots in Pop Culture Films and TV Shows: Medieval boots often make appearances in films and TV shows set in historical or fantasy worlds. They add authenticity to costumes and help transport viewers to different eras. Iconic characters like knights, peasants, and royalty are often depicted wearing period-accurate footwear. Renaissance Fairs: Renaissance fairs and medieval reenactments are popular venues where people can experience the charm of medieval boots firsthand. Attendees often dress in period attire, complete with authentic-looking boots, to immerse themselves in the historical experience. Challenges in Studying Medieval Boots Preservation Issues: One of the main challenges in studying medieval boots is preservation. Leather is an organic material that deteriorates over time, making it difficult to find well-preserved examples. Archaeologists and conservators must use specialized techniques to preserve and study these fragile artifacts. Authenticity Concerns: Another challenge is ensuring the authenticity of medieval boots. Reproductions and fakes can sometimes be mistaken for genuine artifacts, complicating the study and understanding of historical footwear. Rigorous authentication processes are essential to maintain the integrity of historical research. Interesting Facts Unique Findings: Archaeological excavations have uncovered some unique and fascinating medieval boots. For example, a pair of 14th-century boots found in London had intricate tooling and decoration, indicating that even ordinary people enjoyed a touch of fashion. Lesser-Known Details: Did you know that medieval boots sometimes featured hidden compartments? These

What causes leather boots to crack over time?
Hi stranger , If you are wondering What causes leather boots to crack over time? then you are at right place.Leather boots have a timeless appeal, blending rugged durability with classic style. But, as any leather enthusiast will tell you, maintaining that pristine look can be a challenge. Cracks in leather boots are a common issue, and understanding why they occur and how to prevent them is key to preserving your favorite footwear. So,What causes leather boots to crack over time? Why Leather Boots Crack Over Time Natural Wear and Tear: Leather is a natural material that undergoes wear and tear over time. Just like our skin, leather ages, and with age comes the inevitability of cracks. Every step you take flexes the leather, causing small stress points that eventually lead to cracking. Environmental Factors: Environmental elements play a significant role in the degradation of leather. Prolonged exposure to sunlight, extreme temperatures, and varying humidity levels can cause leather to lose its natural oils, leading to dryness and cracking. The Impact of Lack of Care Neglecting Regular Maintenance: Leather requires consistent care to stay supple and resilient. Neglecting regular maintenance, such as cleaning and conditioning, accelerates the drying process, making cracks more likely to appear. Infrequent Conditioning: Conditioning is crucial for leather health. Infrequent conditioning means that the leather doesn’t receive the necessary oils to keep it flexible. Dry leather is brittle leather, and brittle leather cracks. Common Mistakes in Leather Care Using the Wrong Products: Not all leather care products are created equal.Using harsh chemicals or products not designed for leather can strip away its natural oils and protectivefinishes, increasing the risk of cracks. Skipping Waterproofing: Waterproofing leather boots is essential, especially if you frequently wear them in wet conditions. Water can cause leather to swell and then dry out unevenly, leading to cracks. Environmental Factors Contributing to Cracking Exposure to Sunlight: Just as too much sun can damage our skin, it can also damage leather. UV rays break down the leather’s fibers and cause it to dry out, leading to cracks. Extreme Temperatures: Both heat and cold can be detrimental to leather. Extreme heat can cause the leather to dry out and crack, while extreme cold can make it brittle and prone to breaking. The Role of Moisture and Humidity Effects of Excess Moisture: Excess moisture from rain or sweat can lead to mold and mildew growth, which breaks down the leather fibers and causes cracking. Dehydration and Drying Out: On the flip side, lack of moisture can be just as damaging. Leather that is allowed to dry out completely will lose its elasticity and crack. How to Prevent Leather Boots from Cracking Regular Cleaning and Conditioning: Regular cleaning and conditioning are the cornerstones of leather care. Clean your boots to remove dirt and debris, and condition them to replenish essential oils. Proper Storage: Store your leather boots in a cool, dry place away from direct sunlight. Use shoe trees to maintain their shape and prevent creasing. Choosing the Right Products for Leather Care Recommended Leather Conditioners: Look for conditioners that are specifically designed for leather. Products containing natural oils, like mink oil or neatsfoot oil, are excellent for maintaining leather’s suppleness. Avoiding Harmful Chemicals: Avoid products with harsh chemicals or alcohol, as they can strip the leather of its natural oils and protective coatings. Steps to Restore Cracked Leather Initial Cleaning: Start by cleaning the boots thoroughly to remove any dirt and grime that could interfere with the restoration process. Applying Leather Filler: For deeper cracks, a leather filler can be used to fill in the gaps. Apply it carefully and allow it to dry completely before moving on to conditioning. Conditioning and Polishing: Once the filler is dry, condition the leather to restore moisture. Finish with a polish to protect the surface and add shine. Preventative Measures for Long-Term Care Scheduled Maintenance Routines: Set a regular schedule for cleaning and conditioning your leather boots. Consistent care can prevent the formation of cracks. Protective Treatments: Consider applying protective treatments like waterproofing sprays to add an extra layer of defense against the elements. Case Studies: Before and After Restoration Success Stories of Leather Restoration: There are numerous success stories of leather boots being restored to their former glory with the right care and products. These cases demonstrate the effectiveness of proper leather care. Lessons Learned: From these case studies, we learn that prevention is key, but even cracked leather can often be saved with timely intervention. DIY Leather Care Tips Homemade Conditioning Solutions: You can make your own leather conditioner using natural ingredients like beeswax and coconut oil. These homemade solutions can be just as effective as store-bought products. Quick Fixes for Minor Cracks: For minor cracks, a simple application of conditioner may be enough to improve the leather’s appearance and prevent further damage. When to Seek Professional Help Identifying Severe Damage: If your boots have severe cracks or other significant damage, it may be best to seek professional help. Leather specialists have the tools and expertise to handle serious repairs. Finding a Leather Specialist: Look for a reputable leather repair specialist in your area. Reviews and recommendations can help you find someone who will take good care of your boots. The Importance of Quality Leather Choosing Durable Materials: Investing in high-quality leather boots can make a big difference in their longevity. Quality leather is less prone to cracking and other forms of damage. Investing in High-Quality Boots: While high-quality leather boots may be more expensive upfront, they often end up being more cost-effective in the long run due to their durability and longevity. Conclusion Leather boots are a stylish and durable footwear option, but they require proper care to stay in top condition. Understanding the causes of cracking and taking preventative measures can keep your boots looking great for years to come. Regular cleaning, conditioning, and appropriate storage are essential steps in maintaining leather’s natural beauty and resilience. By avoiding common mistakes and
how to stretch leather without ruining it
Stretching leather can be a tricky task, but with the right techniques, you can achieve a comfortable fit without damaging your beloved items. Whether it’s shoes, gloves, or jackets, leather can be stretched to provide a better fit and enhance comfort. This guide will walk you through various methods to stretch leather, ensuring you get the perfect fit every time. Why Stretch Leather? Leather is a natural material that tends to mold to your body over time. However, sometimes you need a quicker solution to avoid discomfort. Stretching leather can help: Alleviate tightness and prevent blisters. Enhance the overall comfort of your leather items. Prolong the lifespan of your leather goods by reducing stress on the material. Methods to Stretch Leather There are several effective methods to stretch leather. Here, we’ll explore some of the most popular techniques. 1. Using Leather Stretch Spray Leather stretch spray is a convenient and effective way to stretch leather. Here’s how to use it: Purchase a leather stretch spray from a reputable store. Spray the tight areas of the leather item until it is damp but not soaked. Wear the item (if it’s shoes, gloves, or a jacket) to help it mold to your body. For other items, use a stretching device. Allow it to dry naturally. The leather will expand as it dries. 2. Stretching with a Hairdryer A hairdryer can also be used to stretch leather. This method works well for shoes and gloves. Wear thick socks if you are stretching shoes, or use a stretching device for other items. Heat the tight areas with a hairdryer on medium heat, keeping the dryer a few inches away to avoid damaging the leather. Flex the leather while it’s warm to encourage stretching. Allow it to cool while still wearing or using the stretching device. 3. Using Rubbing Alcohol Rubbing alcohol can help soften and stretch leather. Mix equal parts water and rubbing alcohol in a spray bottle. Spray the mixture on the tight areas of the leather. Wear or use a stretching device until the leather dries. Repeat if necessary until you achieve the desired fit. 4. Stuffing with Wet Newspaper This method is ideal for stretching shoes or bags. Wet some newspaper and wring out the excess water. Stuff the leather item with the wet newspaper, focusing on the tight areas. Let it dry naturally. The leather will stretch as the newspaper dries and expands. 5. Professional Stretching Services If you’re not comfortable stretching leather yourself, consider using professional stretching services. Many shoe repair shops offer leather stretching services and can ensure a perfect fit without the risk of damage. How to Maintain Stretched Leather Once you’ve successfully stretched your leather items, it’s important to maintain them properly to preserve their new shape. Conditioning: Regularly condition your leather items to keep them soft and supple. Use a high-quality leather conditioner to prevent the leather from drying out and cracking. Avoiding Overstretching: Be mindful not to overstretch your leather items. Stretching them too much can weaken the material and reduce their lifespan. Regular Use: Wear your leather items regularly to maintain their shape. If you don’t use them often, consider using stretching devices to keep them in the right shape. Conclusion Stretching leather is a practical solution to achieve a comfortable fit for your beloved items. By using methods such as leather stretch spray, hairdryers, rubbing alcohol, or wet newspaper, you can effectively stretch shoes, gloves, and other leather goods. Always remember to condition your leather regularly to maintain its softness and prevent damage. Avoid overstretching to ensure the longevity of your items. If you’re unsure about doing it yourself, professional stretching services are available to help. With these techniques, you can enjoy the perfect fit and extend the life of your leather goods. For additional tips, check out our guides on How to Break in Leather Boots Quickly and How to Repair Leather Boots. FAQ Section 1. Can all leather be stretched? Not all leather can be stretched effectively. Full-grain leather and high-quality leather items stretch better than bonded leather or synthetic leather. 2. How much can leather stretch? Leather can typically stretch up to half a size, but this varies depending on the type and quality of the leather. 3. Is stretching leather permanent? Stretching leather can provide a more comfortable fit, but it may return to its original size over time, especially if not worn regularly. 4. Can I stretch leather at home? Yes, you can stretch leather at home using various methods such as spray, a hairdryer, rubbing alcohol, or wet newspaper. However, professional stretching services are also available if you prefer not to do it yourself. 5. How often should I condition my stretched leather items? It’s a good idea to condition your stretched leather items every 3-6 months, depending on how often you use them and the environmental conditions they are exposed to.